Walkthrough Home | Dino Crisis UK | Forums | Products
Copyright notice: If you want to copy this walkthrough for your own site, please ask permission BEFORE you do so and place the following code on your site at the top of each walkthrough page:
SECTION THREE
Go through the door at the end to the Passageway To The Power Room. There a couple more flying creatures out here, so don't dawdle! Run around the fan to the door at the other end and head inside. There may be a Recovery Aid near the door before you enter, but it's up to you whether you want to risk picking it up. Inside the Elevator Power Room, climb down the ladder. Push the shelves out of the way to find a Hemostat, if you want it. Pick up the B1 Crane Card that you see on the floor.
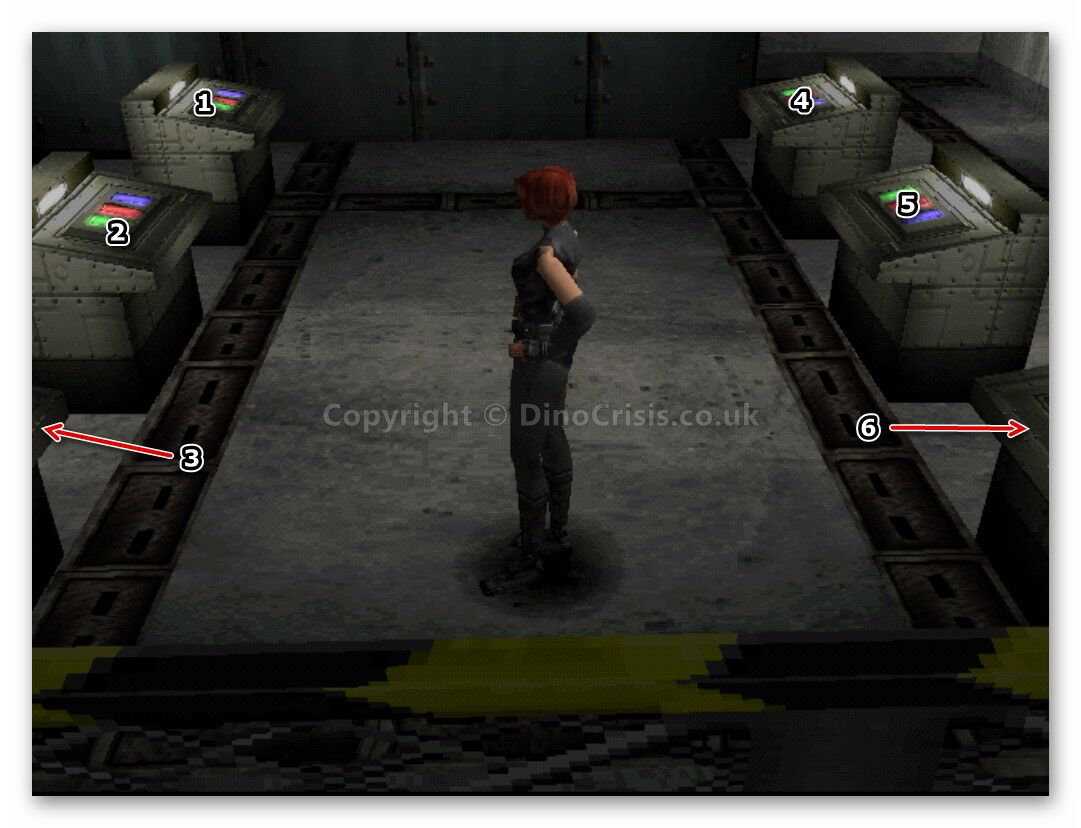
This room holds six control panels (screenshot). They need to be set in the correct order to activate the elevator outside.
On each panel there are three switches, RED BLUE and GREEN, they correspond to the colored pipes they are going to drop from the ceiling. The pipes need to be arranged so they all reach from one end to the other without interruption. In order to solve the puzzle, use the following sequence. Stand directly in front of each panel and press 'Action' to select the colours:
1. Press RED on panels 4 and 3
2. Press GREEN on panels 5 and 2
3. Press BLUE on panels 1 and 6
If you did the above steps correctly then the pipes will be in the correct order and you will have another scene in which the elevator generator will come back to power. If during the steps you pressed the wrong color switch accidentally, then press the same switch button on the same panel and the pipe will be reset.
Climb back up the ladder and exit the room. Another cut scene shows Regina being attacked and lifted up by a pterenadon. When the DANGER sign flashes up, mash the controller buttons as fast as you can or Regina will end up as fan mince! If you are successful, the creature is the one that ends up falling into the fan, giving Regina the chance to escape back to the elevator control room, avoiding the creature flying above.
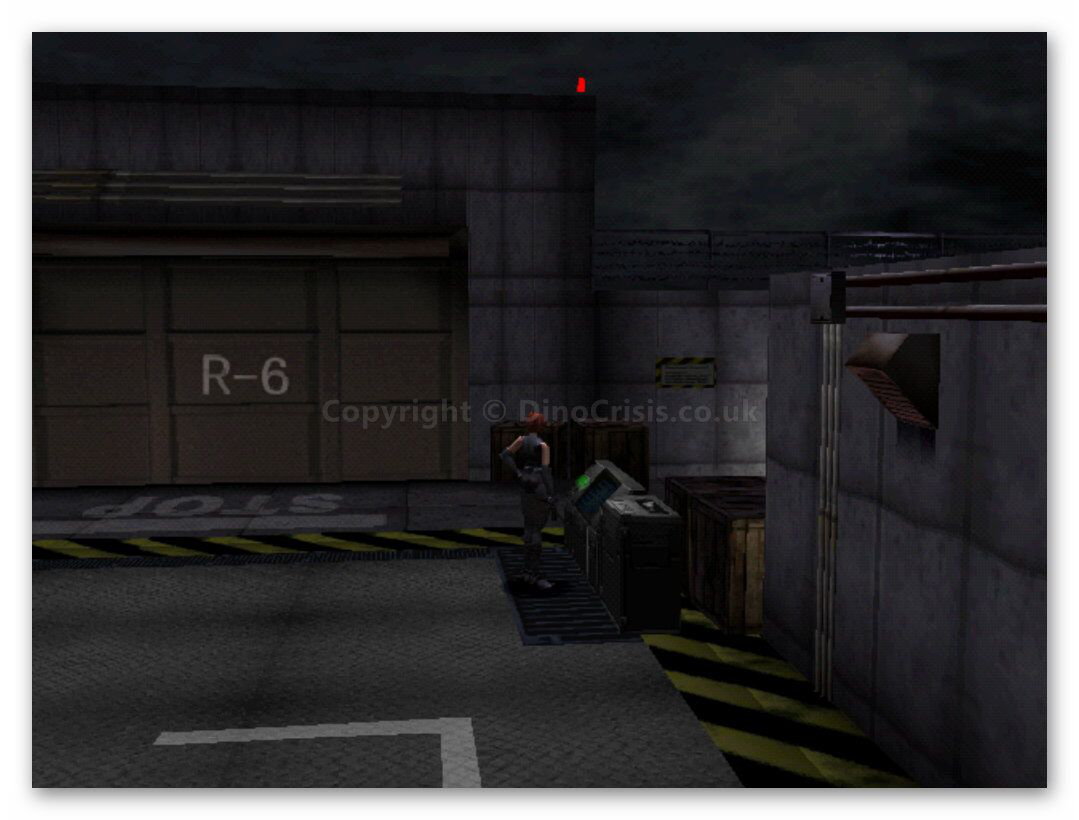
Run through the room and out to the Large Size Elevator. If you didn't pick up your dropped weapon before, you can do so now. It should be past the elevator and close to an An. Aid (screenshot). Just walk over the weapon to retrieve it, and don't forget to equip it. Stand in front of the elevator control panel and activate it (screenshot).
The next cut scene will show if you followed Rick: Regina and Rick help Tom to the elevator which takes them all to the Carrying Out Room B1. You would have ended up here by yourself had you continued to follow Gail instead of Rick.
A load of large containers are blocking the way out, so they need to be moved before you can go any further. Make your way to the metal ladder an climb up it. A Recovery Aid is hidden behind the shelves at the top. You will see a control panel. Stand in front of it and go into your inventory and select the crane card. Use this on the control panel, and you can now activate it.
This is another puzzle. You need to move some of the containers out of the way to create a path to the next section of the facility, but of course it's not that easy. Once you activate the control panel, you will see a selection of cards that you can use to move the crane and pickup and drop the containers. Do it this way:
Exit the control panel and climb back down the ladder.
The next cut scene will show if you followed Rick: Rick helps Tom and tells Regina to get on with the mission herself, and not to take any bull from Gail.
Follow the path that has been cleared to reach another body. You can read the memo if you like, but it doesn't contain any information that you don't have already. There's also an An. Dart M in the corner of the area. You can enter either the single or double doors to get to the Hallway For Carrying In Materials. If you followed Rick, a short cut scene shows Rick and Tom being attacked by a Raptor. Tom pushes Rick out of the way and points his weapon at the animal, and the cut scene ends.
Opposite the door through with you entered is another door which you can unlock if you like. It leads to the first backup generator out in the backyard to the facility. However, there's no need to go there, yet.
Turn off the lasers and follow the passage to the left. At this point, a raptor may or may not attack through a hole in an electrified gate. DANGER signs warn you to mash your controller buttons again as it grabs Regina, and if successful, the dino is pushed back onto the wire and is electrocuted1.
Follow the passage to Hall B1. This is where Regina would have gone had she followed Rick in the previous section.
Keep going and enter into the Medical Room Hallway. Regina spots some small dinosaurs feasting on something. They may look harmless, but if they bite you they will eventually kill you. Don't waste your time trying to shoot them as it will just attract more. Run past them and run into the Medical Room on her left. This is also another save point. If you followed Gail, you don't need to go into the medical room, unless you want to save your game, as you will already have everything from in there. Just continue on and up the stairs.
If you enter the medical room, a cut scene shows the sad tableau of Rick standing over the body of Tom. She tries to reassure him that Tom's death wasn't his fault, but Rick isn't convinced. He heads back to the control room.
Inside the room, in a box to the right of the doorway (as Regina entered), is a plug. On the desk at the opposite end of the room to the main door is a VERY important ID Card, which you will need for the rest of the game. There is also a Med. Pack M in the cabinet to the left. There is a memo on the desk explaining that an ID card is needed to enter the strategy room. In the room beside the desk is an emergency case, but you can't open it as you don't have the key, and won't have until later in the game.
Now you have to make your way to the strategy room. Leave the medical room, saving your game if you want. Turn left and head up the stairs and past the control room. Go through the management office and out through the other door, saving your game if you wish.
Turn left, and left again, past the toilets, and use the key card to enter the Strategy Room. You don't need to enter here if you followed Rick, just go straight to the elevator hall.
There's plenty to grab in here, but you'll already have everything if you followed Rick. There's a plug on the floor, and on the table in the centre of the room is the F.C Device (Fingerprint Collecting Device). This device inputs fingerprint identification data onto an ID card.
Read the data file on the table. Here you learn that it's possible to rewrite an ID card using a computer terminal and fingerprints from a corpse collected by the Fingerprint Collecting Device. That sounds interesting! Find and collect the DDK Code Disc E on the table. There's also a Yellow Emergency Box2 on the wall at the far end of the room.
Now that you have the ID card and the F.C. Device, you can rewrite the card so you can access the elevator in the elevator hall. To do so, leave the strategy room, follow the passage to the main entrance and enter the Elevator Hall behind the stairs.
All of the personnel codes that you have been collecting do have a purpose. Stand close to the body of the researcher close to the clear map and use the F.C Device to collect his fingerprints. Now go out through the other door to the Lecture Room Hallway. Enter the office and go to the terminal on the other side of the room. Use the ID card on it and enter the number of the guy who's fingerprints you just collected: 58104. This information was gleaned from the whiteboard on the wall in the same room, remember?
Go through the process of rewriting the ID card and inputting the fingerprint data, and you are now left with a card that can access the next level of the facility.
Go back to the elevator hall and head for the elevator with the flashing, green light. You can now use the card to access it. As you enter the elevator, another raptor drops down on you through the ceiling! More DANGER, so mash those buttons! When it's off you, get rid of it. You find yourself behind the shutters that lead to the medical room hall. You can't go through them so will have to use the door at the other side from the elevator. Inside the room are two An. Aids and a map on the wall. Save the map data and go through the next door by setting the DDK device and entering: LABORATORY.
1At this point you may want to check whether or not Regina is bleeding as the raptor has given her quite a bashing. Use something from your medical inventory if so. Also, sometimes the raptor doesn't fall back onto the wire and you have to deal with it yourself.
2Interesting fact about the emergency boxes - once you are in one, you can access any of the same colour that you have previously accessed. Just press 'Access' at the top of the emergency box while you are inside it.
I hope you find this guide useful. If you would like anything clarified, or would like to comment on this or anything else, please post in our forums or contact me here.